HOW CAN WE HELP YOU? Call 1-800-TRY-CHOP

In This Section
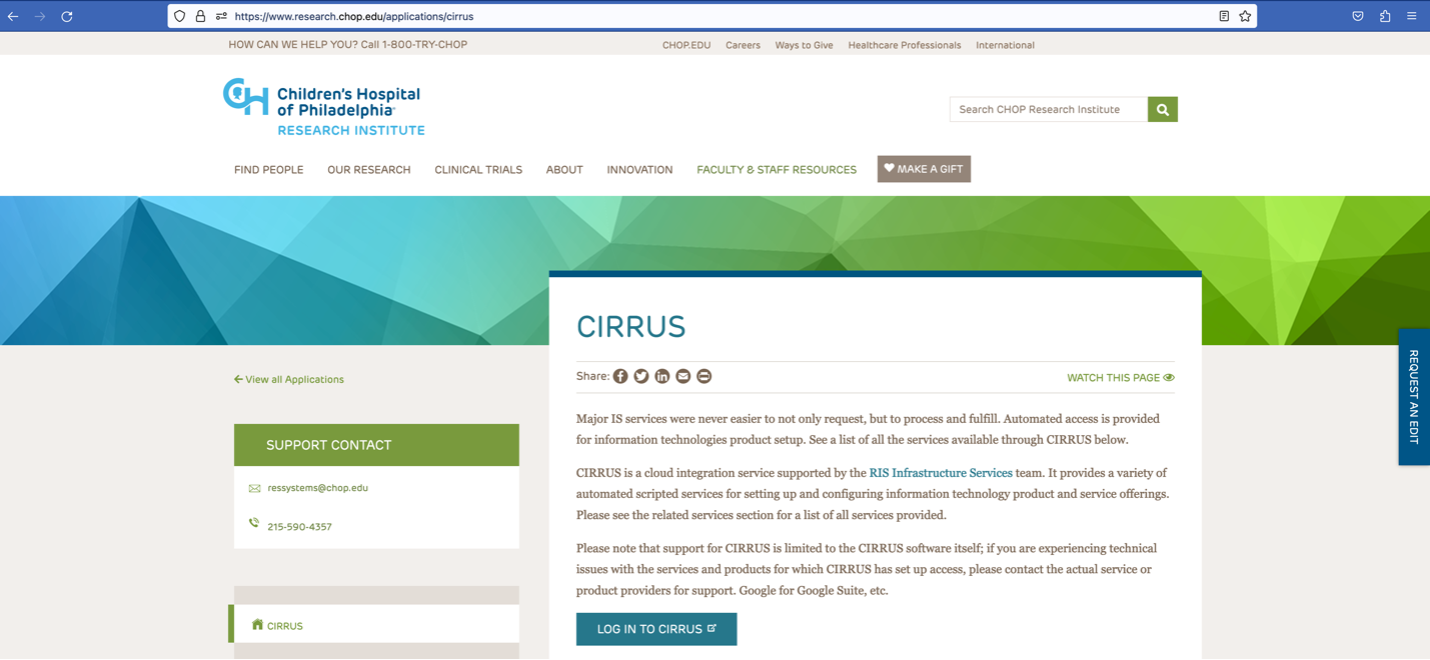
Respublica - High Performance Compute Cluster Help Guide
Published on February 4, 2023 · Last updated 2 months 3 weeks ago
Find detailed instructions on Respublica - High Performance Compute Cluster.
Service: Request Access to the Respublica HPC
Requisites: Cost Center and Activity
Step 1
Connect to https://www.research.chop.edu/applications/cirrus and click "Cirrus Log In"
Step 2
At the Login prompt, enter your CHOP username, click "Remember this setting" and Click "Next"
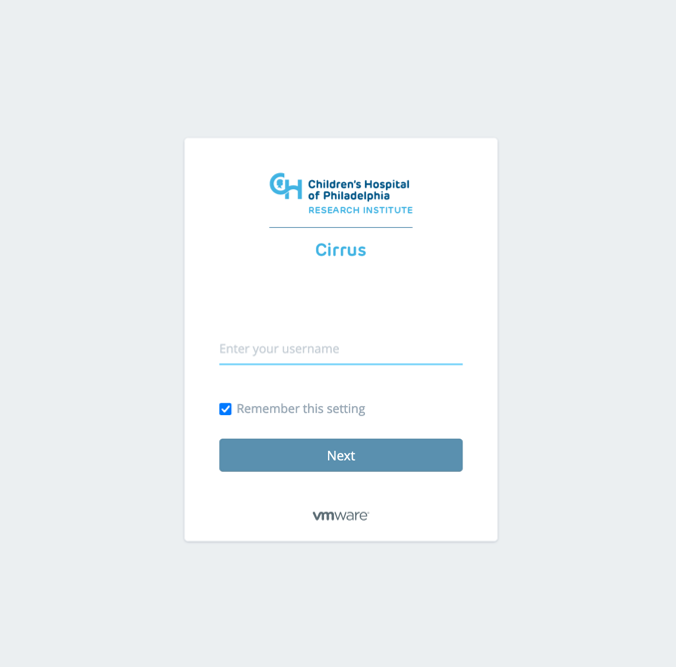
Step 3
Enter your CHOP Password and Click the "Sign in" button

Step 4
Click on Catalog tab (It should be the default when first log in), also you are able to see any virtual machines resources were deployed in our virtualization environment

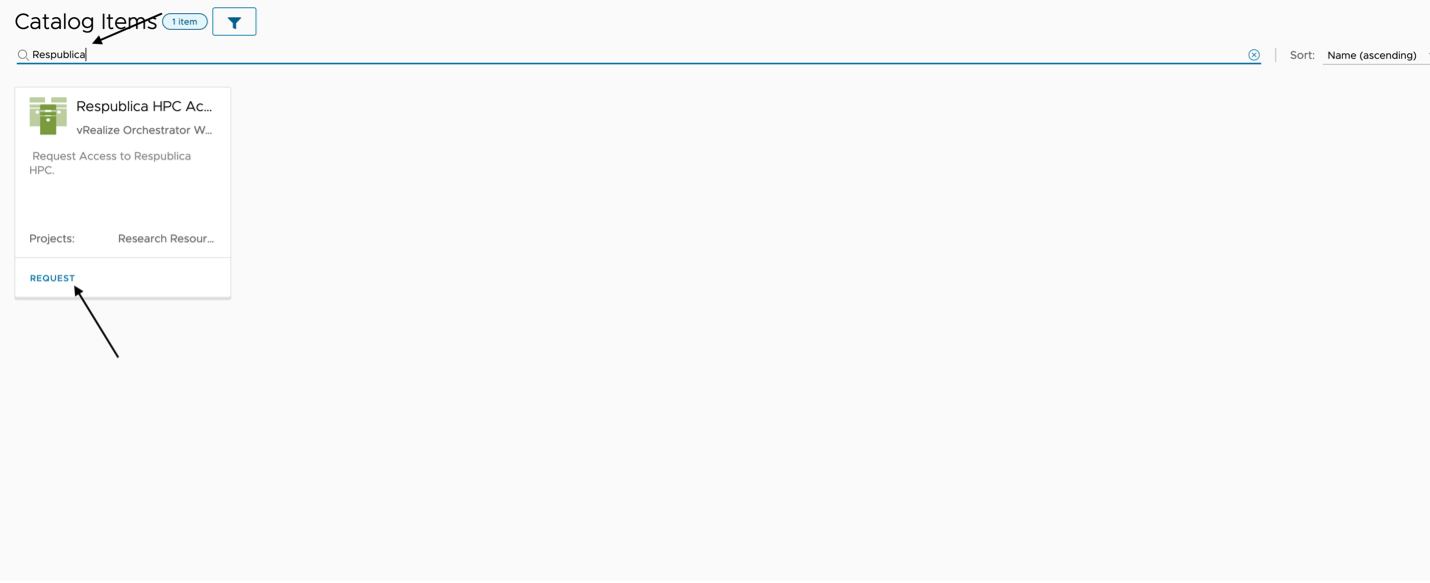
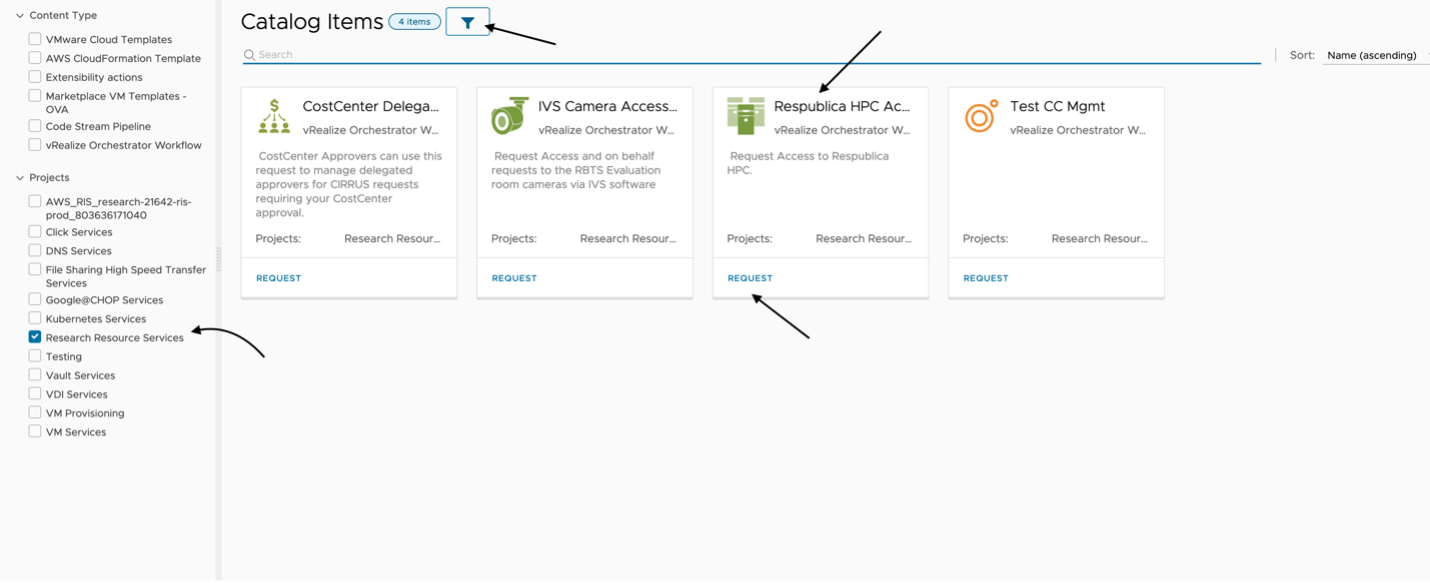
Step 5
In the Search for Catalog Items field, "Respublica" and Choose "Respublica Access Request"
Or Click to Apply Filter and Select "Research Resource Services" catalog item in the left navigation pane
Step 6
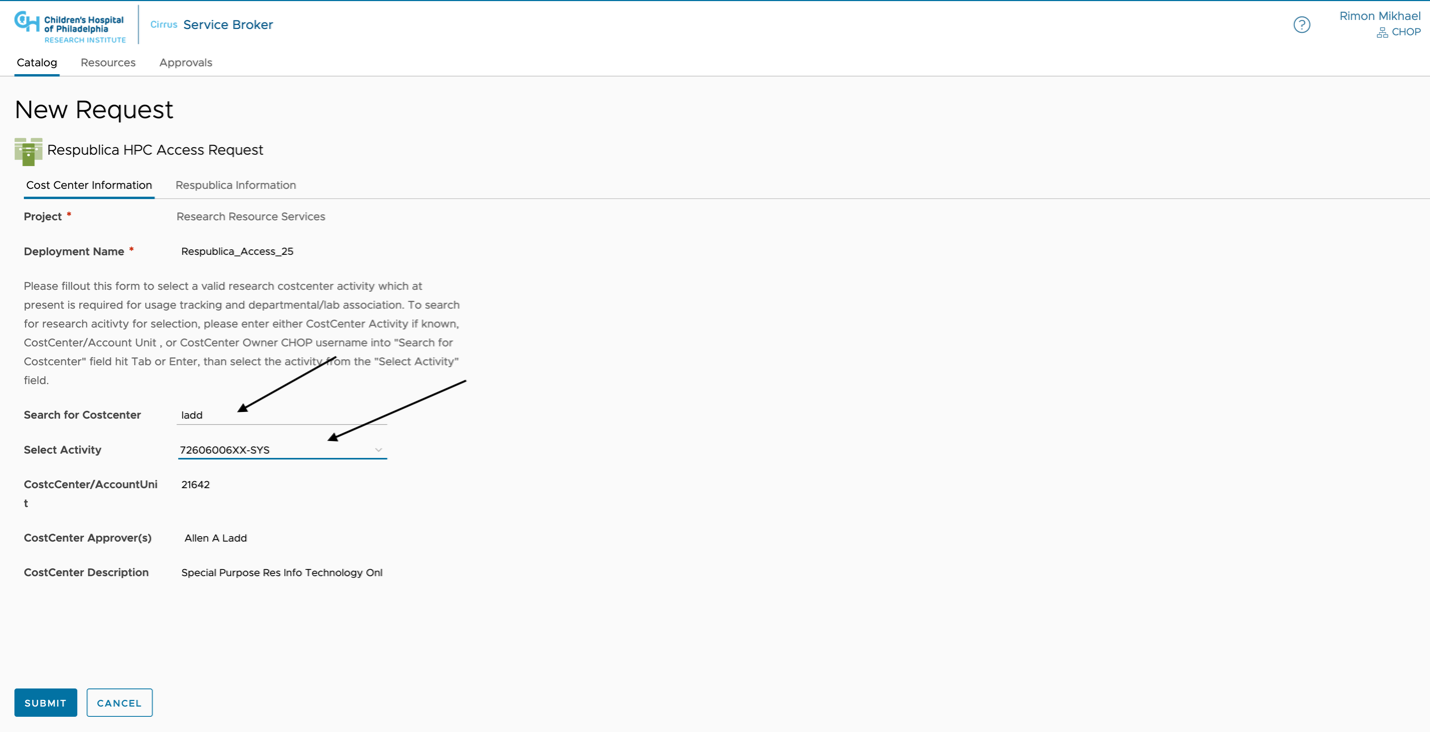
Please choose the search cost center tab as show below.
Under the Cost Center Information tab, please search and choose your Cost Center and Grant ID. You can search the field by grant owner or grant number or cost center number
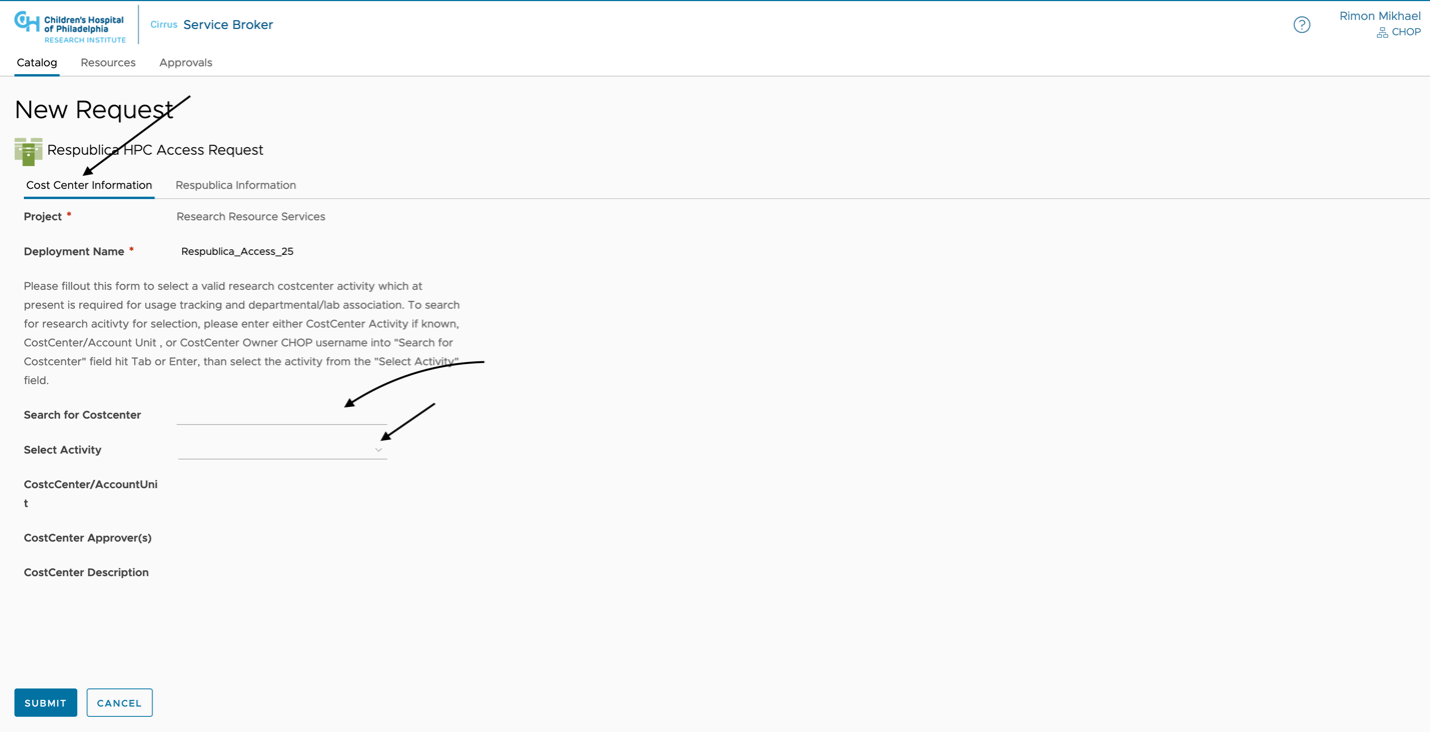
Select grant field going to populate accordingly. Please choose your grant from the drop down menu
Step 7
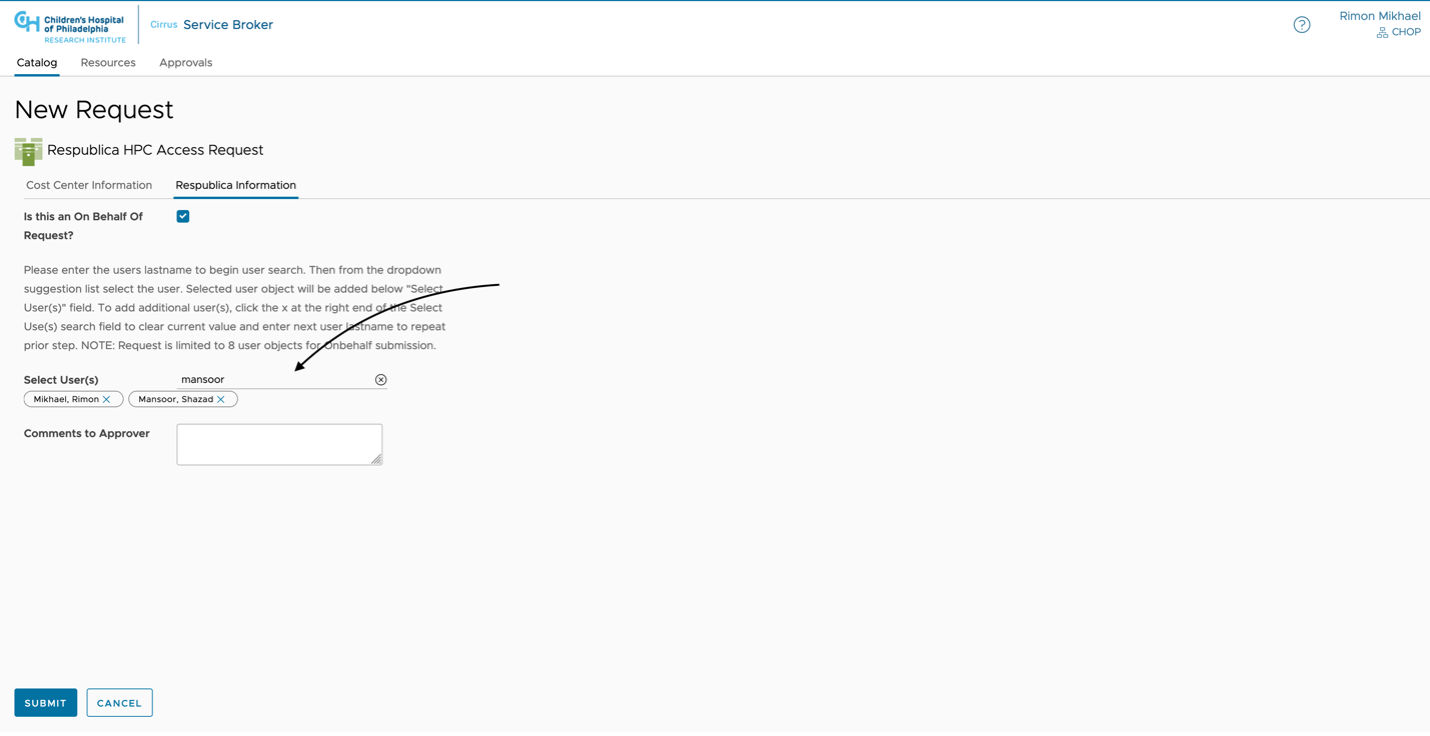
Please Choose the Respublica Information tab
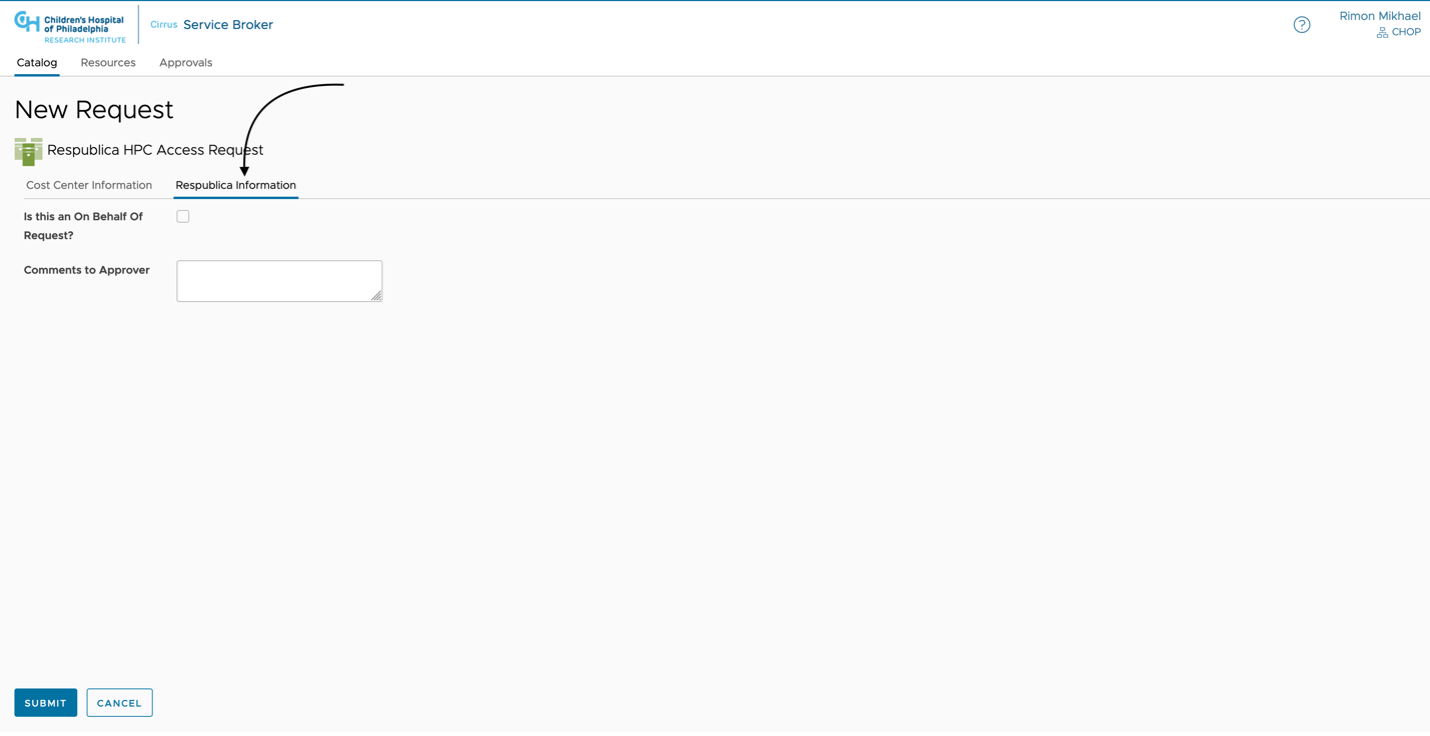
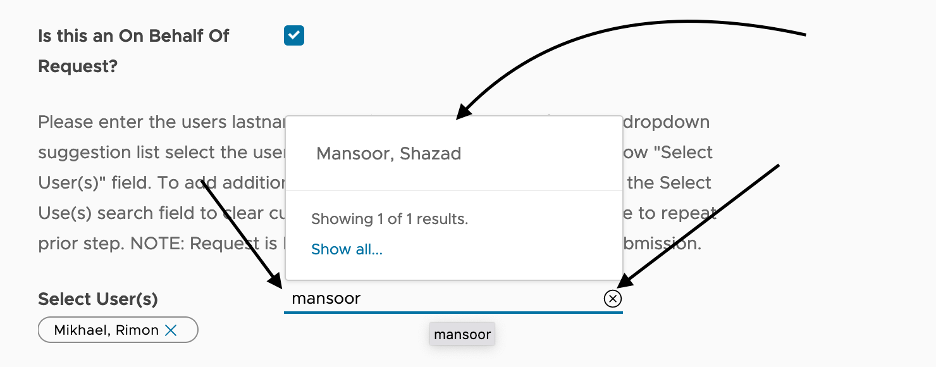
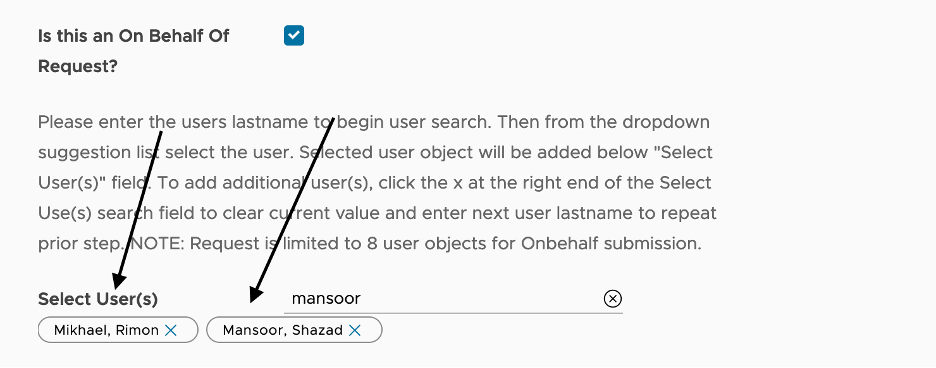
If this is an on behalf of request please check the box "On Behalf" otherwise just leave it empty.
Enter CHOP user first name or last name and choose the user from the pop-up menu. If you need to add other users, please click the x icon to remove the name typed and type another user first or last name then choose the new user to add to the list - as per the screenshot below.

If this is your personal request, leave the check box empty

Step 8
Leave a comment for the approver

Step 9
Click "Submit" to finish